Monstera Deliciosa is a popular plant among plant lovers worldwide, due to mostly the fact that it’s easy to take care of it and it looks beautiful when it gets bigger. It originates from Central America and it’s mostly known as “Swiss cheese plant” or “Split-leaf philodendron” although it has a lot of common names. This climbing evergreen plant is the best option for either residential or commercial spaces, that’s why you have probably seen it a lot in the past years.
Monstera Deliciosa can grow up to 75 feet if it lives in its natural habitat, butdon’t expect for it to reach more than 10 feet inside your house. The “deliciosa” part of its name refers to its fruit, which is sweet and savory, many people say that the taste resembles with a mix of pineapple and banana. Sad to say, but your Monstera won’t bear fruits when grown inside your house.
If you have a young plant, don’t expect the new leaves to have fenestrations. The fenestrations are the split and perforated leaves. You can expect your Monstera to develop fenestrations after 2 years.
After you read the guide below you will know pretty much all that you need to grow your Monstera Deliciosa to a size that everyone will envy it.

Monstera Deliciosa Sunlight Requirements
You can place your Monstera pretty much anywhere in your house and it will surely grow. It can withstand low light, but develops more quickly and dramatically in indirect bright light. However, intense, direct sunlight should be avoided because it may cause the leaves to burn. Use a grow light if you don’t have access to a spot with adequate lighting for your Monstera.
Monstera Deliciosa Soil Requirements
Monstera being a tropical plant likes moist soil, but it won’t do her well if the soil is to wet. Use a potting mix that drains effectively. To improve soil aeration, add elements like perlite or lava rocks as needed. One more thing you can do is to choose a pot that has a drainage hole at the bottom, to avoid the situation in which the water stays at the bottom of the pot.
Monstera Deliciosa Water Requirements
During the growing season, give the plant one to two weekly waterings. Add water until the surplus drains through the drainage holes. Because the plant has used all of the water it requires, do not transfer the surplus water to the container. Between waterings, the soil should be allowed to dry slightly. In the fall and winter, only water occasionally.
Monstera Deliciosa Humidity Requirements
This plant thrives in almost any environment, but if you want to give it an extra treat, spray it with a Mister once a week. It’s ideal to sprinkle your Monstera in the morning so that the water can evaporate before nighttime.
Monstera Deliciosa Temperature Requirements
Temperatures between 60 and 80 degrees Fahrenheit are ideal for your Monstera. It can’t stand temps below 55 degrees or rapid temperature drops. In the winter, keep away from cold drafts and direct airflow from heaters.
Do I Need Fertilizer for Monstera Deliciosa?
Feed your plant once a month during the spring and summer for best results. A small amount of food will go a long way toward promoting root health and growth. During the winter, you don’t need to fertilize your Monstera because it’s crucial to give it a chance to rest.
When to Repot Monstera Deliciosa?
Whenever you choose a pot for your Monstera it’s a good ideea to get a pot a little bit bigger than its roots because it tends to grow fast and you don’t want to repot it too often. In the ideal situation you will need to repot your Monstera every two years. You can check its roots even before getting to the two years mark and if the roots are too big you can repot it.
How to propagate Monstera?
Before propagating your Monstera you need to decide how you want to do this. You have a few options: stem cuttings in water, stem cuttings in soil or air layering. Many people consider the stem cuttings in water the best and easiest Monstera propagation technique and I also agree with this.
Important
Before deiciding to propagate your plant you should note that the best time to do it is in spring and summer.
Propagating Monstera Deliciosa via stem cuttings
The first step is to make sure you have the right tools: plant snips (you can get away with a knife or scissors, but make sure they are sharp) and a clean surface where you will work to avoid contaminating the plant or the cuttings. Sanitaize your tools and the surface before you do anything else.
When you are harvesting your stem cutting you should make sure you cut below a leaf node. The node is the swollen part of the stem and from there your little plant will start growing roots. Make sure you have at least two or three nodes on the stem for each cutting.
You will need to make the cut at a 45-degree angle at a quarter to a half inch below the node. On the stem you will need to have at least two or three healthy leaves to support the development of your new Monstera plant.
Propagate your Monstera cutting in soil
It’s simple to propagate your cuttings in soil. You’ll need:
- a 6-7″ pot with drainage holes (keep in mind that it’s crucial to drain the excess water of your Monstera plant) that is at least 2-3″ deep;
- perlite, leca, lava rocks, sand or a mix of peat moss and any of the mentioned materials;
- rooting hormone is optional. Although the propagation of Monstera Deliciosa is easy in general, it won’t harm your cutting the use of a rooting hormone.
A step by step guide:
- add your soil in the pot and make sure it is mosit;
- insert one or two fingers into the soil to make it easier to insert the cutting;
- insert the cutting into the soil (the nodes need to be positioned at the bottom) to a depth of at least 1.5 inches;
- you can cover the plant with a plstic bag to promote a higher humidity;
- after planting the cutting you should place it in indirect light.
You won’t need to water the cutting until it develops roots and you can expect to develop the roots within three weeks.
Propagate your Monstera cutting in water
The most popular option when trying to propagate any plant cutting is in water. You’ll need any kind of container, you can use even a glass of water. There are a couple of things you should know about the container:
- it needs to be clean to avoid getting any pathogens on your Monstera cutting;
- it needs to be transparent so you can see how developed the roots are and when it’s time to transplant your baby Monstera to soil;
- it needs to be tall enough to to support the cutting without the container tipping over or the plant falling out of water;
- it needs to be wide enough to easily remove the plant after the roots grow.
You will need to fill the container with water until the node is one inch under water so it will start to develope the roots. You can use tap water, however if you are unsure about the quality of your tap water you could easily filter it. You need to replace the water every two weeks, but it doesn’t hurt the baby Monstera if you change it every week. In case you see algae developing, this happens if you place the container in a sunnier location, or if the level of the water decreases rapidly replace the water ASAP.
When the new roots are two to four inches long you can transplant it to soil. You will need a pot with a circumference that is 2 or 3 inches wider than the developed roots. It’s important for the plant to use a pot with drainage holes and the potting soil also needs to promote drainage (perlite, leca, lava rocks, sand or a mix of any of these and peat moss).
Propagate your Monstera using the air layering technique
You’re probably asking what is the air layering technique? Simple and short answer:this technique forces your Monstera Deliciosa to develop aerial roots that will actually be your new plant’s root system.
For this you will need:
- sphagnum moss;
- any kind of plastic wrap;
- some string, rubber band or anything that you can use to tie up;
- a spray bottle filled with clean water.
Air layering step by step:
- locate the node where you want the aerial roots;
- make a small cut using a sharp and clean knife;
- wet the sphagnum moss (get rid of the excess water), wrap up the node with moss and tie it with some string;
- wrap up the moss with plastic wrap and tie it again with string;
- every couple of days you’ll need to remove the plastic wrap, spray the moss with water and wrap it again in plastic wrap;
- it takes a few months for the plant to develop aerial roots;
- after the roots grow over one inch long, remove the plastic, strings and moss and it’s time to cut the stem;
- you can plant the cutting intro a pot with good drainage and soil (perlite, leca, lava rocks, sand or a mix of any of these and peat moss).
Advantages of air layering:
- there is a minimum chance of shock or infecting the plant is lower so the succes rate is greater than using the other techniques;
- it’s easy;
- rooting will take place on the plant, you don’t need different containers or pots before transplating it.
Disadvantages of air layering:
- it takes a few months to develop the aerial roots;
- your plant won’t look nice with moss and plastic wrap on it.
Important
Other types of Monstera plants you may be interested in:Monstera Adansonii, Monstera Burle Marx Flame, Monstera Laniata, Monstera Lechleriana.
Monstera Deliciosa Common Pests
As long as your Monstera is healthy, it won’t be affected by any pests, but under certain circumstances there’s a chance that you’ll encounter a variety of pests.
There are some common pests that can easily turn your beautiful Monstera Deliciosa plant into a headache: mealybugs, aphids, thrips, scale and spider mites. When you find any of these pests on your plant you’ll need to spray it with a direct water stream to get rid of them. You can use even insecticidal soap to wash tyour plant’s leaves.
Important
Take action as soon as you notice even one bug, don’t let them affect your Monster because it will be a little bit harder to get rid of them when the problem is big.
You may want to read these posts:

How to Grow Marjoram Indoors
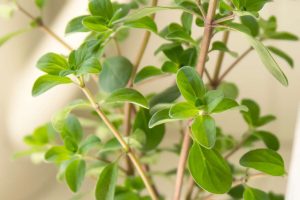
Marjoram is a versatile herb that can be easily grown indoors, providing you with fresh leaves all year round. To get started, choose a small pot with good drainage holes to ensure the roots don’t become waterlogged. Fill the pot with well-draining soil, such as a mixture of potting soil and perlite or sand.

How to Grow Tarragon Indoors
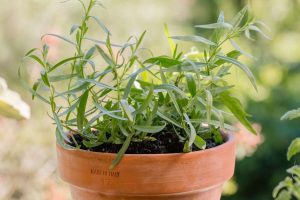
Tarragon is a versatile herb that can be easily grown indoors, making it a great addition to any indoor garden. Its distinct flavor adds depth and complexity to various dishes, from salads to soups and sauces. With its delicate leaves and attractive growth habit, tarragon also makes for an appealing decorative plant in your home.

How to Grow Oregano Indoors
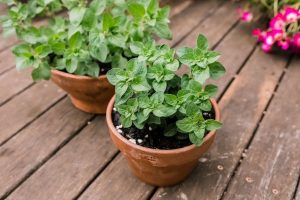
When it comes to selecting the right oregano variety for indoor growth, there are a few key factors to consider. Firstly, you’ll want to choose a variety that is well-suited for container gardening. Compact or dwarf varieties such as Greek oregano or Italian oregano are great options as they don’t require much space and can thrive in smaller pots.

How to Grow Catnip Indoors
When it comes to selecting the right catnip variety, there are a few factors to consider. Firstly, you’ll want to think about your cat’s preferences. Some cats may be more attracted to certain varieties than others, so it’s worth experimenting with different options. Additionally, consider the climate and growing conditions in your area. Certain catnip varieties thrive better in specific climates, so choose one that is well-suited for your region.

How to Grow Parsley Indoors
When it comes to choosing the right variety of parsley for indoor growth, there are a few factors to consider. First and foremost, you’ll want to select a variety that is well-suited for container gardening. Look for compact or dwarf varieties that won’t outgrow their pots too quickly. This will ensure that your parsley plants have enough space to thrive indoors.

How to Grow Bay Laurel Indoors
When choosing the right location for your bay laurel, it’s important to consider a few key factors. First and foremost, this plant thrives in full sun or partial shade. It’s best to find a spot that receives at least six hours of direct sunlight each day. This will ensure that your bay laurel grows healthy and strong.
