
The Repotting Process
The repotting process is a critical step in maintaining the health and vitality of your indoor plants. In this section, we will guide you through the various stages of repotting, including safely removing the plant from its current pot, inspecting and pruning the roots, preparing the new pot, transferring and settling the plant, and providing essential aftercare instructions.

Removing the Plant from its Current Pot
Techniques for Safe Removal: Gently tap or squeeze the sides of the pot to loosen the plant’s root ball. Turn the pot upside down while supporting the base of the plant with your hand. Tap the bottom of the pot to help release the plant. If necessary, use a trowel or your fingers to carefully loosen the edges of the root ball.
Dealing with Root-Bound Plants: If you notice that the roots are tightly circling the root ball, it indicates a root-bound plant. In such cases, carefully untangle or tease out the outer roots to encourage new growth and prevent further binding. You can also make shallow vertical cuts on the sides of the root ball to stimulate root branching.

Inspecting and Pruning the Roots
Examining the Root System: Thoroughly inspect the plant’s root system for signs of health, disease, or pests. Look for white, firm, and well-distributed roots, which indicate a healthy plant. If you notice mushy, discolored, or foul-smelling roots, it may be an indication of root rot or other issues.
Step-by-Step Root Pruning: If you encounter excessively long or tangled roots, or if the root ball is too large for the new pot, root pruning is necessary. Use sterilized pruning shears to trim away any dead, damaged, or excessively long roots. Make clean cuts, avoiding any jagged or torn edges. Remember to prune conservatively, focusing on the outermost roots while preserving the majority of healthy roots.
Preparing the New Pot
Proper Pot Preparation: Before transferring the plant, ensure the new pot is clean and has appropriate drainage holes at the bottom. Add a layer of small stones or pottery shards to the bottom of the pot to enhance drainage. Fill the pot with fresh, well-draining potting mix suitable for your plant species.
Appropriate Potting Techniques: Create a small mound of potting mix in the center of the pot. Place the plant on top of the mound, ensuring that the crown of the plant is at the same level or slightly above the rim of the pot. Gently spread the roots outward, and add more potting mix around the root ball, firming it gently to provide stability.
Transferring and Settling the Plant
Transferring the Plant: Lift the plant from the bottom while supporting the root ball with your hand. Carefully transfer it to the new pot, ensuring the plant remains centered. Avoid excessive handling or shaking, as it can cause stress or damage to the roots.
Settling the Plant: Gently tap the sides of the pot or give it a slight shake to help the potting mix settle around the roots. Adjust the position of the plant if needed. Ensure the plant is stable and upright, with the stem or crown positioned correctly.
Watering and Aftercare: Water the plant thoroughly but avoid overwatering. Allow the excess water to drain out through the drainage holes. Place the newly repotted plant in an appropriate location, considering its light and temperature requirements. Monitor the plant closely in the following weeks, providing appropriate care, and addressing any signs of stress or adjustment issues.
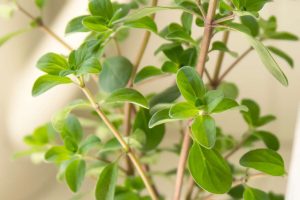
Marjoram is a versatile herb that can be easily grown indoors, providing you with fresh leaves all year round. To get started, choose a small pot with good drainage holes to ensure the roots don’t become waterlogged. Fill the pot with well-draining soil, such as a mixture of potting soil and perlite or sand.
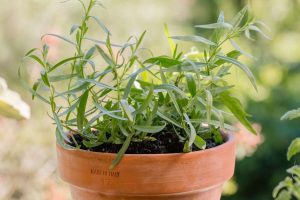
Tarragon is a versatile herb that can be easily grown indoors, making it a great addition to any indoor garden. Its distinct flavor adds depth and complexity to various dishes, from salads to soups and sauces. With its delicate leaves and attractive growth habit, tarragon also makes for an appealing decorative plant in your home.
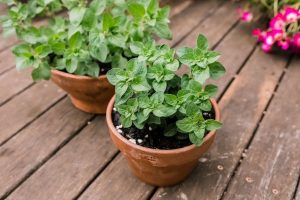
When it comes to selecting the right oregano variety for indoor growth, there are a few key factors to consider. Firstly, you’ll want to choose a variety that is well-suited for container gardening. Compact or dwarf varieties such as Greek oregano or Italian oregano are great options as they don’t require much space and can thrive in smaller pots.

When it comes to selecting the right catnip variety, there are a few factors to consider. Firstly, you’ll want to think about your cat’s preferences. Some cats may be more attracted to certain varieties than others, so it’s worth experimenting with different options. Additionally, consider the climate and growing conditions in your area. Certain catnip varieties thrive better in specific climates, so choose one that is well-suited for your region.

When it comes to choosing the right variety of parsley for indoor growth, there are a few factors to consider. First and foremost, you’ll want to select a variety that is well-suited for container gardening. Look for compact or dwarf varieties that won’t outgrow their pots too quickly. This will ensure that your parsley plants have enough space to thrive indoors.

How to Grow Bay Laurel Indoors
When choosing the right location for your bay laurel, it’s important to consider a few key factors. First and foremost, this plant thrives in full sun or partial shade. It’s best to find a spot that receives at least six hours of direct sunlight each day. This will ensure that your bay laurel grows healthy and strong.